

Food photography styling has come a long way since its birth in the 1950s. When 4-color food photos first started to replace culinary illustrations, the emphasis was on perfection. Everything matched, every cherry in the Jell-O mold perfectly placed, and props were quite formal, showcasing the recipe or food product at its “best”.
Today we strive for recipes that are approachable, look do-able, and most importantly have that I-want-to-eat-that-NOW appeal. Not only are crumbs left in plain sight, they are often strategically placed. But while the goal is for a more relaxed portrayal, creating a compelling image is just as hard. The challenge is how to make a recipe tantalizing without the use of all five senses. Photography must rely on only one – VISUAL. Coagulated cheese does not convey the appeal of a fresh-from-the-oven lasagna that is a mess (in the best possible way!!) of gooey cheese.
Today anyone can add a bit of style to an image, and must if there is any chance to make that photo go VIRAL! When the stylist is also the photographer, there are no limitations on how to present the food.
A professional food stylist can be limited by decisions (camera angle, lighting, central focus, and more) made by the team, including the client, art director, and photographer. A blogger or social media star has carte blanche to make those decisions. Still, it’s important to remember that photography decisions are inextricably linked to food styling needs. So here are 21 tricks of the trade for food styling and photo shoot tips to help you get those mouth-watering photos.
What’s your angle? Build for your camera angle.
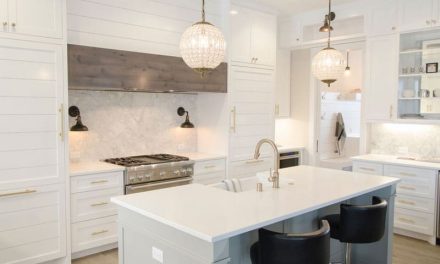
The two most common angles for social media food shots are directly overhead – particularly popular on Instagram – or vertical. Overhead shots work well if you have a beautiful, artistically arranged, composed salad or a spread of many colorful food items, and height is not important to tell the story.
- Be careful to avoid an overhead light source when shooting from above, because you will create your own shadow. Lighting is best diffused and from the side.
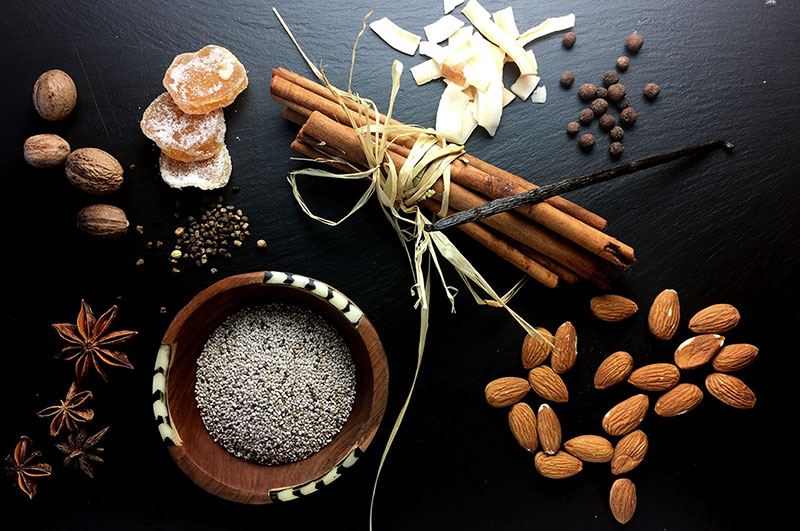
Photography credit: KATYKECK.COM
This overhead shot works because it emphasizes the different shapes of the featured items. It tells a story of the rich array of spices used, much more than showing a bowl of unidentifiable mixed ground spices. While not particularly colourful (almost monochromatic) it makes a bold graphic statement.
Vertical shots are great for showcasing layers – think looking straight into a stacked-high McDonald’s sandwich – or anything that is tall and layered. You would miss the action if you took the overhead shot, which flattens the food to two dimensions.
- Use side or backlighting (ranging from 9 o’clock to 3 o’clock, where 12 o’clock is straight behind the food/camera) when shooting vertical. Lighting from the front is least flattering and tends to flatten your subject.
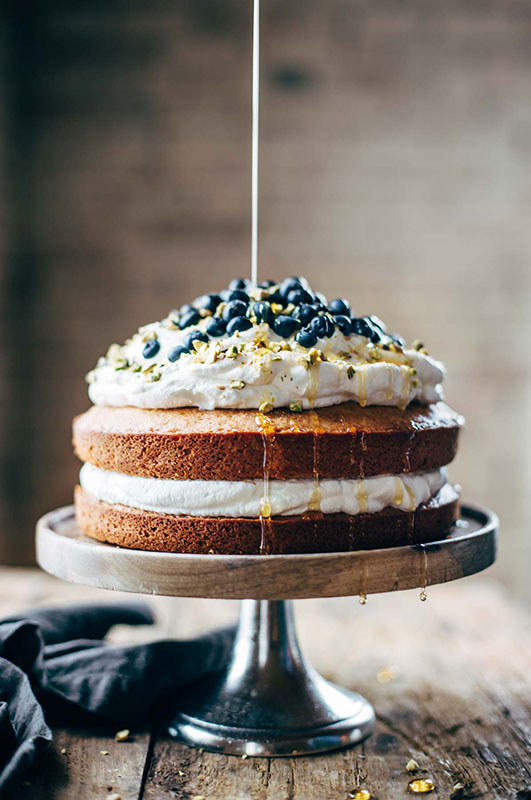
Photography credit: PINCHOFYUM.COM
This vertical shot highlights the many layers of this cake, a detail that would be lost in an overhead shot. The drizzle of agave is a “call to action” that makes the viewer want to pick up a fork and dive right in.
Once you know your camera angle, you know where to look at your food for foodstyling. Get down to that level and check the view. Are your pancakes listing to one side?
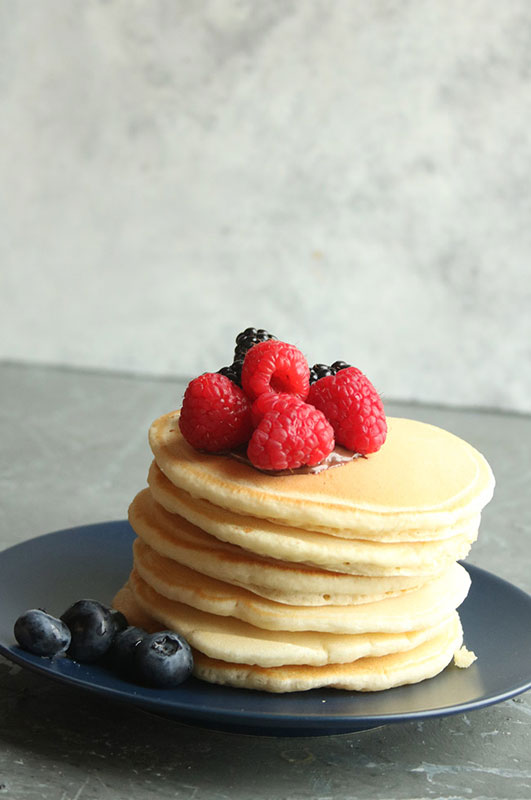
Photography credit: KATYKECK.COM
A vertical shot is perfect for a stack of pancakes because you can see all the layers. This stack was created in a hurry with no attention to matching sizes or making sure it was straight. If this came to you in a restaurant, chances are you could still spin the plate and find a better side. Don’t forget to adjust the garnish so the berries have their best face forward.
- Match the pancake size and stack one by one to create a tall straight stack. For extra tall or flimsy food, add thin sheets of cardboard between layers for support.
Whatever angle you chose, make sure the food has its best side forward from the camera’s POV (point of view). Add extra sprinkles and garnish with fruit, vegetables or herbs toward (or just off) the camera’s focus.
- Clump “like” ingredients together (as opposed to mixing them) so that each component stands out. Notice how the raspberries on top and blueberries on the bottom pop more than if both places had mixed berries, even when your stack is crooked!
One last note on camera angles or orientation. Instagram tends to favor square images, but keep in mind that with cell phone orientation being vertical (iPhone reigns supreme in much of the world), vertical photos display better than horizontal. Vertical also has the ability to vary the depth of field (more on that below) that can’t be matched with landscape orientation.
How’s Your Composition? Balance, Proportion, and Scale.
Since we have happily surpassed the matchy-matchy days of symmetry in composition, the meaning of balance has also evolved. Balance no longer means a place setting with a salad fork next to a dinner fork, in perfect alignment. In fact, putting the spoon in the bowl would once be considered rude. Now it’s inviting. “Please join me, won’t you? Pull up a spoon and dive in.”
- Make sure that no ingredient is laid out in formation, military style, in perfect alignment. Let a julienne of peppers fall haphazardly.
- Use odd numbers in creating visual high points (even numbers hark back to old-school concepts of “balance”).
- Rule of thirds: Think of your frame divided into thirds, both vertically and horizontally. Focus on one of the four intersection points of those imaginary lines and place your hero there.
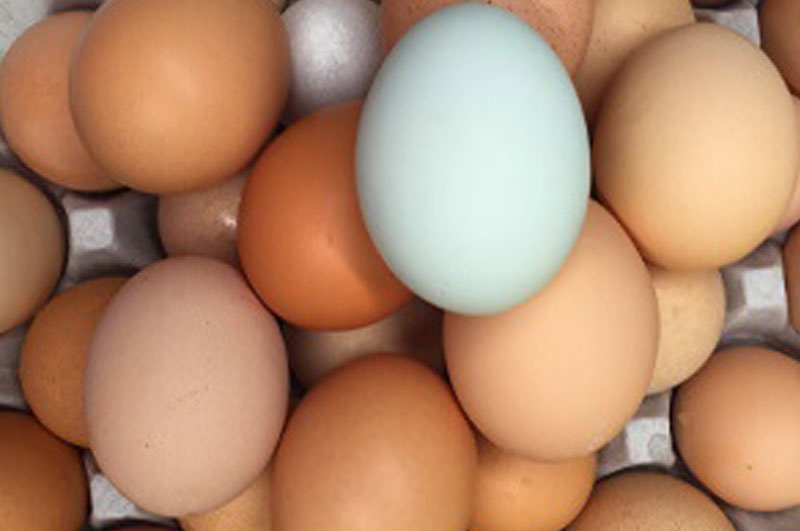
Photography credit: KATYKECK.COM
These eggs are a bit haphazard in colour and arrangement…on purpose. But notice that there is only one blue egg and it is off centre, very close to the intersection of the top third and the right third.
- Arrange props or food that break the exterior edges of one to three sides of the frame. This draws the eye around the image, letting the viewer’s brain fill in what’s more than meets the eye. Exciting! Engaging!
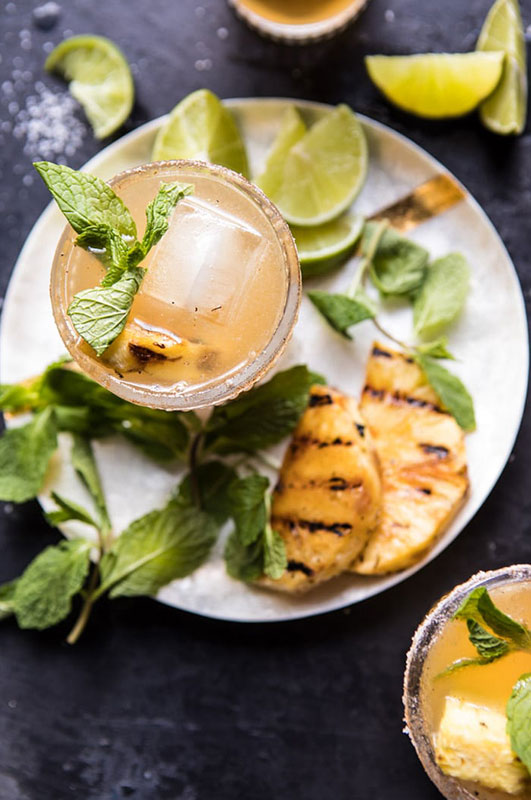
Photography credit: HALFBAKEDHARVEST.COM
Objects in this photo break the frame on three sides, and the plate just kisses the edge on the fourth (left side). This creates a much bigger palette than a single cocktail would command on its own.
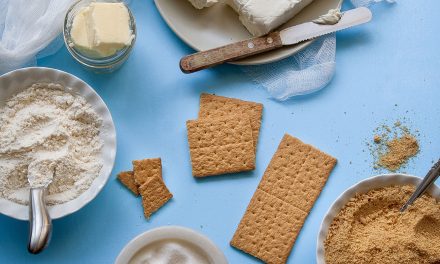
- Add something to your photos that will leave clues as to scale. Absent these clues, a photo runs the risk of raising questions, making the viewer stop and judge. A well-propped photo like the one below creates an intuitive understanding of everything on display.
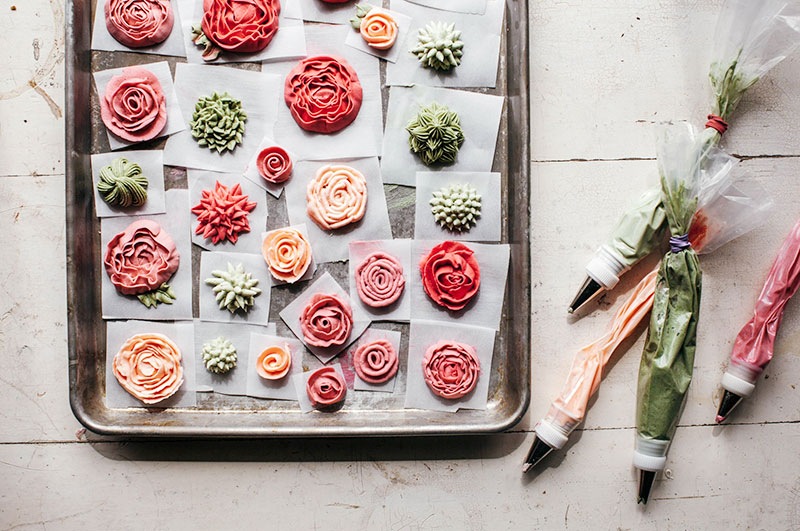
Photography credit: MYNAMEISYEH.COM
The pastry bags drop hints about what size those flowers are. Also, notice the framing on this shot: Items break the edges on the top and right side but leave an almost frame-like border on the bottom and left. That cropping, along with the rustic white table, creates an atmosphere that perfectly translates Molly Yeh’s elegant farm lifestyle.
Who’s the Star? Showcase with Depth of Field.
Figure out the hero, then tell its story! Apple’s portrait mode is a new way of food photography styling which has set trends today. The person in the portrait is in focus while the background falls off, is a bit blurry. That’s shallow depth of field and is a great way to showcase your food’s best feature.
- Create depth of field by focusing on the “beauty” and let the background focus dissolve, creating more ambiance and atmosphere for the dish.
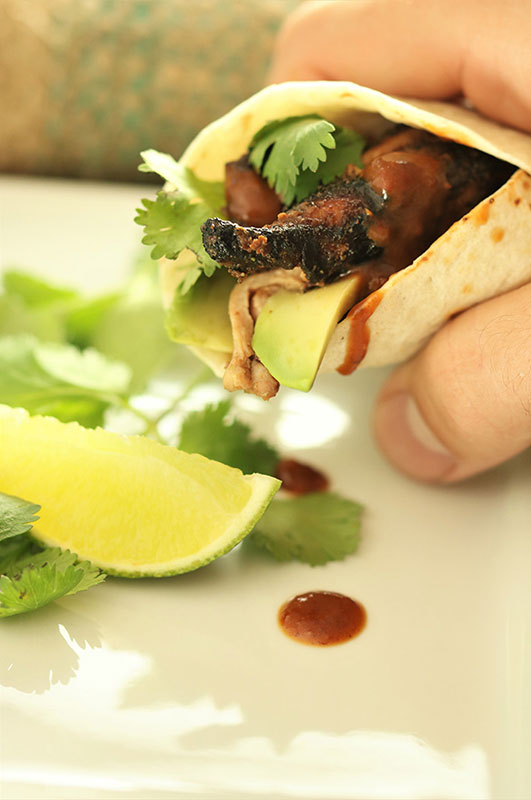
- Style ingredients, that are in sharp focus, such as the seeds and avocado in the photo below. Make sure to use colorful items in the background that can be identified even when out of focus, like purple cabbage and carrots.

Photography credit: KATYKECK.COM
This photo was shot in portrait mode on an iPhone 7+ and you can see the background blurs out a bit. Make sure that the items out of focus have either been established in focus (so it’s a repeat) or are something identifiable even out of focus, like carrots.
Here, the egg strata is the hero. The berries and toast are in the background and slightly out of focus (depth of field is shallow). So, while you want to arrange the berries at different angles and maybe show off the calyx on a strategically placed berry, the styling energy should be placed on the eggs.
- Check to make sure there are not random scraggly bits of overcooked egg or rogue crumbs, and pull out a little oozy cheese. Oozy cheese lets the viewer know this dish is fresh from the oven.
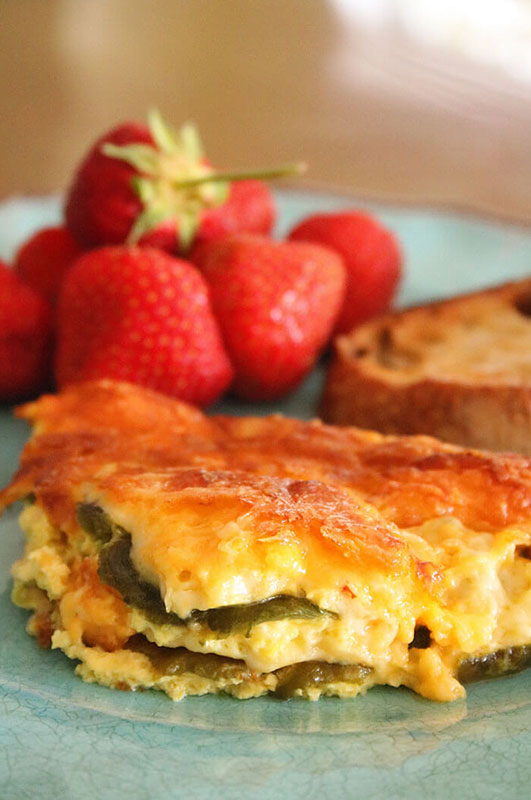
Photography credit: KATYKECK.COM
This image is not heavily styled – it was taken as a casual brunch shot – but there is attention to the orientation of the strata. It is angled slightly away from the camera, yet still showcases the layers.
Food Photography Props: Less is More
When composing your shot, be a bit less precise than you would when setting the table. Angle the spoon to create an upward and to the right angle. Turn a fork over on the plate. Create movement with props, textiles, and textures. When in doubt, use fewer props.
- Consider using butcher or parchment paper between the food and plate or sheet pan to add another dimension and create additional lines or movement.
- Keep it simple and look for matte finish props which won’t bounce light
- Hands may be all the props you need.
Photography credit: KATYKECK.COM
- Place props in an inviting way. In the cake photo below, the fork is clean because we can tell no one has nibbled from the cake. But if bites have been taken, then the utensil should look used, creating continuity.
The photo below brings together many of the tips described above. The hero is the slice, not the cake itself. Notice that the slice has been rotated 180 degrees from its original orientation in the pan, showing off the cake and not just the elaborate icing. By bringing focus forward to the slice, Molly establishes all the beautiful flowers – colors, shapes, and sizes – so that the viewer can subliminally fill in everything on the whole cake behind.
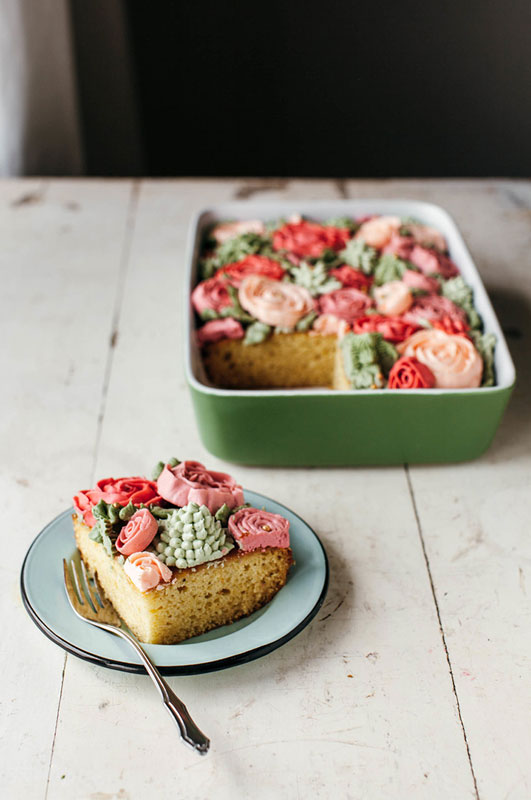
Photography credit: MYNAMEISYEH.COM
Molly Yeh – My Name is Yeh – never disappoints in the photos in her posts. Here she uses negative space (the black in the back) and has divided the shot into thirds, vertically and horizontally. She lets the black background and the table lines literally draw the thirds. Nothing is in the centre. The slice is at the intersection of lower and left thirds and the sheet pan is near the intersection of the upper and right thirds. She lets simplicity and no heavy propping tell the story.
Use spills or a bit of mess as an invitation, but don’t overdo it. Drizzles of blackberry jam on a white cloth just makes me mad. But feel free to twirl the noodles on a fork, splashing the sauce on the plate, or to break a yolk. That creates an immediate need to EAT NOW!
- Use a splash or spill as a prop. Natural spills help create a yum factor. Add a few crumbs, show a drip, let an herb sprig fall haphazardly. Be casual, but careful.
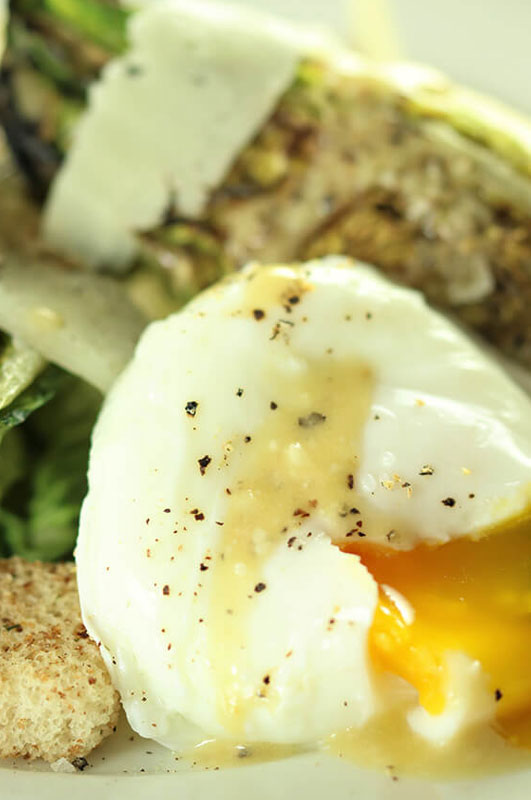
Breaking the yolk adds yum factor and signifies this is fresh from the poacher.
Food Styling Tips & Tricks of the trade
Lastly, here are a few guiding rules and finishing touches to round out the list, along with my favorite professional tools that come in handy for social media shoots.
- Brush & Spritz – oil & water. Brush any food that is starting to look a little dry with some oil to bring it back to life. Spritz herbs, garnishes, or even glassware to give that just-picked, fresh-poured look. If needed, take the dry food off the plate, place on a paper towel and mist with cooking spray.
- Slow down the oxidation of produce that will brown by dipping in water dosed with ascorbic acid or lemon juice.
- Add the final garnishes just before shooting to keep them fresh. If you just have one garnish, a careless sprinkle is good, but if there are multiple toppings, place them in clusters.
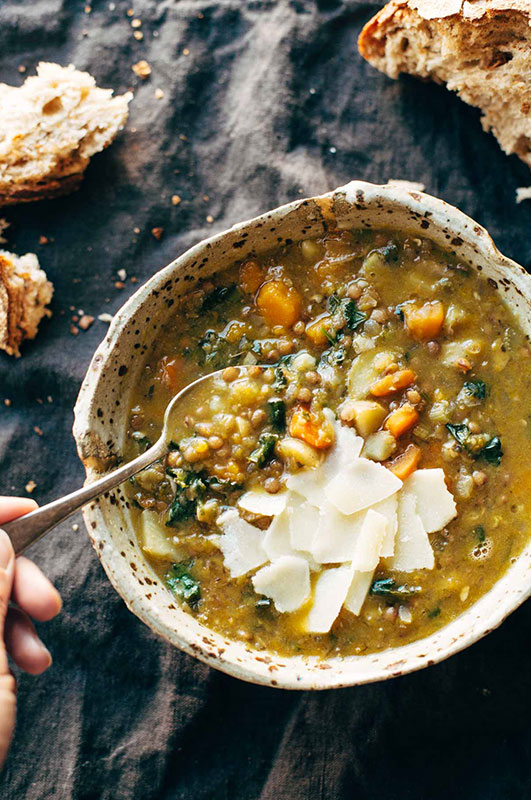
Photography credit: PINCHOFYUM.COM
The carrots are lightly brushed with a bit of soup to convey the idea that they are part of the soup, but they are placed strategically to be seen, as are the lentils in the spoonful. Notice that the Parmesan is only in one place, implying it has not yet been stirred in. This makes it easier for the camera to read. Big chunks of bread add context to the smaller seeds scattered on the cloth.
-
Food Styling Essentials
o Small sharp scissors, like sewing scissors, for trimming scraggly bits
o Assorted small paint brushes for brushing sauce and oil
o Long thin surgical tweezers for placing final garnishes
o Small spritz bottle to mist and refresh produce
o Small offset spatula for lifting layers onto a built stack of food
o Eyedropper for adding sauce or soup on pulled out ingredients
o Arts & Crafts mounting putty to hold things in place
o Straight or T pins to attach things, like the best strawberry top to the best strawberry
Armed with all these rules, tips, tricks and tools, it’s time to pick up a spoon and dive in! Bon appétit.

Photography credit: KATYKECK.COM


